Connect with us

Mobile

Mobile Security: How to Keep Your Devices Safe from Cyber Threats

Published

on

Mobile Security

In today’s digital age, our smartphones have become an integral part of our daily lives. From communication to banking, we rely on these devices for almost everything. However, with this increased dependency comes a heightened risk of cyber threats. Mobile devices are vulnerable to various security risks, including malware, phishing attacks, data breaches, and more. Therefore, it’s crucial to take proactive steps to safeguard our devices and personal information. In this comprehensive guide, we’ll explore the importance of mobile security and provide practical tips on how to keep your devices safe from cyber threats.

Understanding the Threat

Before diving into the measures to enhance mobile security, it’s essential to understand the prevalent threats facing mobile users today:

  1. Malware: Malicious software designed to disrupt, damage, or gain unauthorized access to mobile devices. Malware can come in various forms, including viruses, worms, Trojans, and ransomware.
  2. Phishing Attacks: Cybercriminals use deceptive emails, text messages, or fake websites to trick users into revealing sensitive information such as passwords, credit card numbers, or personal details.
  3. Unsecured Wi-Fi Networks: Connecting to public Wi-Fi networks exposes your device to potential security risks as hackers can intercept data transmitted over these networks.
  4. Outdated Software: Failure to update your device’s operating system and apps leaves it vulnerable to known security vulnerabilities that cybercriminals can exploit.
  5. Lost or Stolen Devices: Physical loss or theft of mobile devices can result in unauthorized access to sensitive information stored on the device.

Tips for Enhancing Mobile Security

Now that we’ve identified the primary threats, let’s explore actionable steps to mitigate these risks and enhance mobile security:

  1. Use Strong Authentication Methods: Enable biometric authentication (such as fingerprint or facial recognition) or use complex passwords/pin codes to secure access to your device. Avoid using easily guessable passwords and never share them with anyone.
  2. Install Security Software: Invest in reputable mobile security apps that offer features such as malware scanning, anti-theft protection, and safe browsing. These apps can help detect and remove malicious software from your device.
  3. Update Regularly: Keep your device’s operating system, apps, and security software up to date. Manufacturers regularly release updates that include patches for known security vulnerabilities, so it’s crucial to install these updates promptly.
  4. Exercise Caution with Apps: Only download apps from official app stores such as the Apple App Store or Google Play Store. Avoid sideloading apps from third-party sources, as they may contain malware or other security threats.
  5. Enable Remote Wipe and Find My Device: Activate built-in features like “Find My iPhone” (iOS) or “Find My Device” (Android) that allow you to remotely locate, lock, or erase your device in case it’s lost or stolen.
  6. Encrypt Data: Enable encryption on your device to protect your data from unauthorized access. Most modern smartphones offer built-in encryption features that you can activate in the device settings.
  7. Be Wary of Public Wi-Fi: Avoid connecting to public Wi-Fi networks for sensitive activities such as online banking or shopping. If you must use public Wi-Fi, consider using a virtual private network (VPN) to encrypt your internet connection and protect your data.
  8. Practice Safe Browsing Habits: Exercise caution when clicking on links or downloading attachments from unknown sources, as they may lead to phishing websites or malware downloads. Always verify the authenticity of websites before entering sensitive information.
  9. Backup Data Regularly: Regularly back up your device’s data to a secure cloud storage service or an external hard drive. In the event of a malware infection or device loss, you can restore your data from the backup without losing valuable information.
  10. Educate Yourself: Stay informed about the latest mobile security threats and best practices for staying safe online. Attend workshops, read articles, and follow reputable cybersecurity blogs to keep abreast of emerging trends and techniques used by cybercriminals.

Conclusion

As mobile devices continue to play an increasingly central role in our lives, ensuring their security is paramount. By following the tips outlined in this guide, you can significantly reduce the risk of falling victim to cyber threats such as malware, phishing attacks, and data breaches. Remember that mobile security is an ongoing process that requires vigilance and proactive measures. By staying informed, exercising caution, and implementing robust security practices, you can keep your devices safe from cyber threats and enjoy a worry-free mobile experience.

Mobile

7 Tips for Developing Apps for Foldable Smartphones

Published

on

Mobile app development

There was a time when owning a smartphone was associated with luxury. Only rich ones could afford them.

But at the start of the 21st century, the smartphone market exploded with dozens of new brands, not only making the price range affordable but also introducing some exciting new features.

Foldable smartphones instantly grabbed the attention of people. Foldability was a unique feature, people could treat their phone like a brochure or leaflet while reading something on it.

And despite the constantly evolving technology and new trends, foldable devices are still here. Samsung, most notably, produces such phones that people still enjoy using and holding in their hands.

If you’re a mobile app developer, you’ve got to think differently when creating an application for foldable devices. Here are some of the factors and alterations to consider in this regard:

1.Create a Resizable App

Since you’re developing an app for foldable smartphones, you must consider the size of such phones. Their screens are significantly larger than traditional phones. Also, these phones are equipped with multi-window mode.

So it’s your responsibility to design an app that’s compatible with both sizes of a screen as well as the multi-window mode. Do some research and find out a simple line of code to make your app resizable according to the mode in which it’s opened.

2.Consider the Two States of the Phone

It’s important to account for the two states of the phone. They both are different from each other. A simple phone will not have a folding feature while the foldable one will work differently.

The foldable phones can be used with both folded and unfolded screens. While designing the functionalities of your app, consider the foldability feature of an app.

Normally, foldable screens have a lot of space on the screen compared to unfoldable ones; the latter is quite rigid. A user has more freedom and space to work with when he’s on a foldable screen.

Be creative and think out of the box. Introduce features that will give the foldable smartphone users a feeling of pride.

3.Make Your App Capable of Handling Multi-Window Mode

A multi-window mode is a mode in which two apps run simultaneously on the same screen. This is only possible on foldable screens — and this is what makes them different from the traditional screen.

But there’s one aspect you need to take care of while designing your app — make it capable of handling multiple apps at the same time. Consider the space your app will occupy, the multi-tasking capabilities of a device, and changes in the app accordingly.

4.Screen Continuity

As said before, there are two states of such phones — folded and unfolded. As a developer, it’s your job to make this experience a seamless one for the end-user. Minimize the number of interface layout shifts to prevent any interruption in the user experience.

5.Adjust Screen Ratio

Foldable devices have different screen ratios, that’s because some have short and bulkier screens while some have long and thin screens. It’s the developer’s responsibility to design an app that fits both types; the app must adjust itself on all foldable screens.

To do it, implement minAspectRatio and maxAspectRatio and find out if the screen is compatible with the device or not.

6.Ensure 100% Quality

Most importantly, you should ensure that your app caters to all smartphones, not just the foldable ones. As we have multiple smartphone brands all across the world, they keep coming up with their own types of smartphones.

It’s the mobile app development company’s responsibility to make sure that the functionality of the app remains optimum, irrespective of the fact the device it is operated on.

Therefore, it’s recommended to plan before you implement. Figure out how many devices your app is supposed to support. Do your research about the screen ratio and resolutions of different foldable phones.

There’s not much you can do about the future technology, but you can take the oldest ones into account before developing your next app.

During the development phase and after completion of a project, run your app on different foldable screens and analyse its performance. You will learn where you need to improve to make your app perfect for all screens and devices.

7.Take Feedback & Improve

Rarely will you reach the most perfect version of your app in the first attempt. You have to keep iterating to meet the increasing requirements of the users. With every new phone launch, developers bump into new challenges.

So the only way to create viral apps is to take feedback seriously and improve your app. The same goes for the apps designed for foldable screens. Keep an eye on the market trends, note specifications of the latest specifications, and reviews on the Play store, so you know how to improve your app further.

Final Thoughts

Mobile app development is a skill that requires both technical expertise and knowledge, as well as creativity. And when it comes to foldable smartphones, you have to be careful because of the varying screen sizes and the user requirements.

A foldable phone user is likely to use multiple apps at the same time, so your app must be optimized for speed. Likewise, it should render a seamless transition experience for different screen modes.

While designing your next mobile app, keep these tips in mind to cater to the needs of all users.

Continue Reading

Mobile

How to Take Screenshot on iPhone 11?

Published

on

By

How to Take Screenshot on iPhone 11?

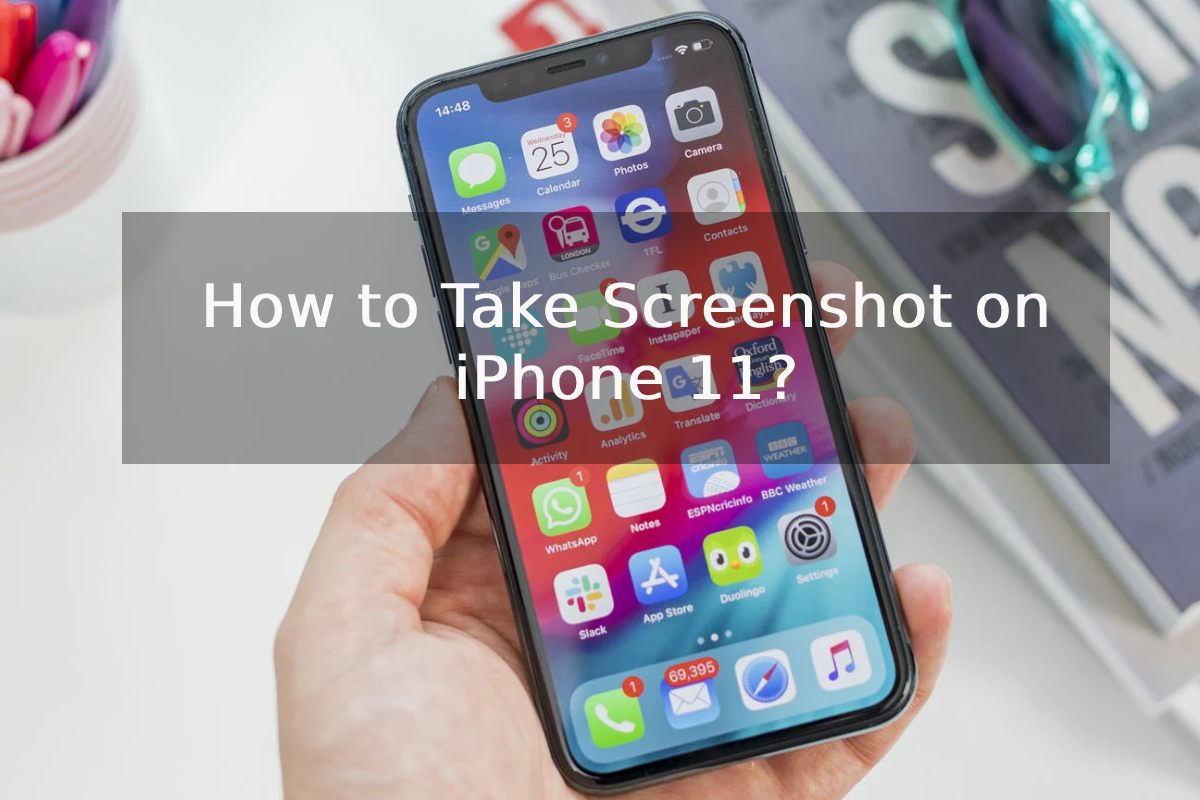
Are you looking for ways on how to take screenshot on iPhone 11? Nowadays, one of the most important things on the internet is screenshots, because they never used to be this powerful earlier, but immense increment in mobile working made them so! And today we are here to find out various ways on how do you take a screenshot on iPhone 11.

Hopefully, you are a regular iPhone 11 user and eager to know the entire procedure. So, stay tuned till the end as we talk about the whole thing with step-by-step explanations.

No matter what, the iPhone 11 remains a powerful smartphone. Be it camera, screen, or battery life, everything is top-notch. Even though the way of the screenshot is unique now, it is not impossible.

Also Read: How to Take Screenshot in Samsung M31

As many people routinely take screenshots, not everyone knows how exactly to capture a screenshot as every phone has its own functions. So here are some ways on how to screenshot on iPhone 11. 

A Step-by-Step Guide on How to take Screenshot on iPhone 11 

Since the iPhone 11 lacks a home button, you must be thinking, taking screenshots is a difficult task. Aren’t you?

As many people don’t know about many functions of a phone, they seek help from google by searching how do you take a screenshot on iPhone 11? If you’re also among those, know that taking screenshots on iPhone 11 is easy and the steps are as follows :

Step 1- Press the side button and volume up button 

Also known as the sleep/wake button, you can take screenshots on iPhone 11 by simultaneously pressing the volume up and the side button.

The moment you release your fingers and let go of the buttons, you’ll be notified as a screenshot captured on your screen.

Step 2- Edit Screenshot 

Once you capture the screenshot, you’ll be notified and also hear a camera shutter sound. Once you see a screenshot preview on your screen, now you can simply edit.

To edit, tap on it and see the options to edit the screenshot. Besides, you can also crop the screenshot according to your choice.

Step 3- Share Screenshot 

Now that you know how to screenshot on iPhone 11, you may also want to share what you’ve saved. To share the screenshot you captured, you can either tap and hold on to the preview to directly send the screenshot to any friend or any app, or else you can go to your screenshot album in the Photos app and select the screenshot and share it.

Therefore, even if you dismiss the screenshot preview, know that it will be automatically saved in your gallery or in the Photos app. For instance, if you want to share something through Whatsapp, you’ll have to choose a contact to share the screenshot and then tap next.

How to Take Screenshot on iPhone 11 Using Assistive Touch

Are you looking for ways on how to take screenshot on iPhone 11 by using one hand? Know that it is possible with the assistive touch and here are the steps :

Step 1- Enable Assistive touch 

Go to Settings>General>Accessibility> Assistive Touch and then enable the Assistive touch option. For those who don’t know what an assistive touch is, then know it is a semi-transparent button added to your screen.

Step 2- Customize top-level menu 

Click on the “Customize top-level menu” option, then tap the custom icon and you’ll see a list from which to select the screenshot button. By doing this, the screenshot button will be added to the Assistive touch menu.

Step 3- Take a screenshot using Assistive touch 

Once you’ve added the screenshot button on the assistive touch menu, you can simply take a screenshot using one hand. All you need to do is tap on the assistive touch button and then the screenshot button.

So by using this method you can stop your search on how to take screenshot on iPhone 11?

Where to view screenshots on iPhone 11?

Are you done taking screenshots? Besides looking for ways on how to take screenshot on iPhone 11, you must probably be looking for the screenshot you’ve captured. To view all your screenshots in one place, go to your screenshot album inside the photos app.

Just like any album in the gallery, the screenshots you take are also automatically added to the album.

Now that you know about how to screenshot on iPhone 11, the next thing is to go through what you’ve saved. So all you need to do is go to the Photos app, from there tap the albums tab and visit the screenshot section and you’ll find everything you’ve captured in one place.

Now, let’s figure out “How do you take a full screenshot on iPhone 11”

Once you’ve taken a screenshot on your iPhone 11, by using any of the above methods, another feature iPhone 11 allows is to take a full screenshot.

All you need to do is tap the preview in the bottom left corner before it disappears then simply choose the full page option in the top right corner.

Why won’t my iPhone 11 Take a Screenshot?

Many times taking a screenshot doesn’t work well. In such cases, the option here is to force reboot your iPhone. All you need to do is hold the power button for at least 10 seconds and then restart your phone.

Some facts you must know while taking screenshots on iPhone 11

Besides, looking for ways to figure out How do you take a screenshot on an iPhone 11, there are some other facts that every iPhone 11 user must know- Check them Out yourself.

  • Aside from cropping the screenshot, you can also mark the screenshot you’ve captured by using any pen or pencil from the tools displayed at the bottom of the screen.
  • After taking a screenshot on your iPhone 11, know that you can add text, signature, or even highlight boxes. This can be done with the help of additional edit options, which you can find in the bottom left corner as a plus button.
  • The Assistive touch button feature allows iPhone 11 users to capture a screenshot with a single touch of a digital button.
  • iPhone 11 screenshot feature allows its users to immediately view and edit the taken images.

It helps after all!!!

No doubt, the iPhone 11 is capable of performing many things, and taking awesome screenshots is one of them. Be it sharing screen images with friends on social media or saving a funny meme, screenshots are extremely helpful for every situation. 

Continue Reading

Mobile

How to Take Screenshot in Samsung M31

Published

on

By

How to Take Screenshot in Samsung M31

Are you looking for directions on how to take a screenshot in Samsung m31? Be it sharing a bunch of secret messages to your best friend or capturing any moment on the screen, screenshots are the most appropriate functions on a phone.

As there are many ways of taking screenshots on a phone, yet some people are unaware of the correct instructions. So here are some simple and easy methods of taking screenshots on the Samsung Galaxy M31.

How to Take Screenshot in Samsung M31

Take screenshots using the key combination 

If you’re thinking it is very difficult to learn how to take a screenshot on Samsung m31, then know that it involves some easiest steps even for beginners to learn easily.

All you need to do is use buttons on the side. Here are some instructions on this method for your better understanding:

  • Step 1- Go to the website or on the page of your social media which you want to capture. Before taking the screenshot, make sure you set up your screen.
  • Step 2- Don’t worry if your screen briefly flashes and shrinks because this is how the screenshots are being saved on your device.

So here you need to press and release the volume down button and power button simultaneously.

  • Step 3- What if you don’t have to press the buttons of your device simultaneously, yet take more screenshots of the screen you’ve chosen. Isn’t this amazing?

Once you take your first screenshot, you’ll notice a screenshot tool strip will appear for a few seconds at the bottom of the screen. Just right below the screenshot tool, look for the term ‘scroll capture.

This tool is helpful for taking a scrolling screenshot without pressing the buttons again and again. The screenshots will be saved automatically just by tapping the scroll capture.

Therefore, taking a screenshot with the Samsung galaxy m31 using the hardware key combination is the most used and easy way.

Taking screenshots using the palm swipe features 

Another easy method of how to take a screenshot in the Samsung m31 is by using the swipe features. If you don’t want to use the button for taking screenshots, then all you need to do is some simple settings.

No doubt, Samsung Galaxy M31 has a lot to offer to its users. One such function it offers for capturing screenshots on Samsung Galaxy M31 is through palm swiping.

This gesture is enabled by default. However, here are some steps for your better understanding :

  • Step 1- Go to your settings on the Samsung Galaxy M31 and then tap Advanced features.
  • Step 2- From Advanced features, you need to go to Motions and Gestures for taking screenshots on Samsung galaxy m31.
  • Step 3- Now, turn on the switch to the right to enable Palm swipe to capture function on your device.
  • Step 4- Once switched on, you can go back to the screen you wish to take a screenshot and simply snap a screenshot of that page by placing the edge of your palm on the screen’s edge.
  • Step 5- One can place their palm either left to right or right to left, as both directions are allowed. Once you’re done, you’ll get an indication with a brief flash and shrink, knowing that your screenshot has been taken.

Taking screenshots using the voice method

Are you looking for ways on how to take a screenshot in Samsung m31 by using voice? Have you heard of Google Assistant? Being an Android user you must have definitely heard about this feature.

But still, there are some people who are unaware of many functions on their own phones. So if you’re also among those who don’t know that it is possible to take screenshots on Samsung galaxy m31 using your voice, then here are some simple steps :

  • Step 1- Firstly you need to enable the Google Assistant feature on your Samsung Galaxy M31.
  • Step 2- Then go to the screen of any page or website you want to take the screenshot of.
  • Step 3- Now simply command something with a clear voice. For instance, “Okay, Google take a screenshot”. This will automatically screenshot any page available on the screen.

Besides, you can also command Google Assistant to take screenshots and post it on social media platforms like Facebook or Twitter.

Taking screenshots using the “assistive touch” menu

Another useful way you must know how to take a screenshot in Samsung m31 is by using the assistive touch menu. This is a floating icon on the screen that comes with a variety of options.

To take a screenshot using this method, you need to follow some instructions such as :

  • Step 1- Go to your Samsung Galaxy M31 settings and then click on accessibility.
  • Step 2- From here go to interaction and dexterity and switch on the assistive menu.
  • Step 3- By doing this, you’ll see an assistive menu on your screen.
  • Step 4- Now simply go to any page you want to take a screenshot of and then select the assistive menu icon from the drop-down menu.
  • Step 5- Now choose the screenshot option, capture the screen and your screenshot will be saved on your device.

Taking screenshots using the application 

In some cases, most people prefer applications over the functions which a device has to offer. So if you’re too looking for an application that can be useful as how to take a screenshot in Samsung m31 then here are some simple steps involved :

  • Step 1- Go to your Google play store and search for apps that allow you to take screenshots on devices. Then, choose the one you prefer and also make sure to go through the functions it offers.
  • Step 2- Once installed, open the app and access permission.
  • Step 3- Now go to the screen which you’ve chosen for capturing and start taking screenshots.

Choose your method… 

However, whether you want to take, save or share, screenshots are always helpful and have become one of the most important things on the internet these days. Therefore, you can choose any of these above-mentioned methods of taking screenshots on Samsung galaxy m31 according to whichever feels most natural and convenient to you.

Continue Reading

Trending