Connect with us

Tech

10GBASE-T Copper Module and its Benefits – A Quick Guide

Published

on

10GBASE-T Copper Module

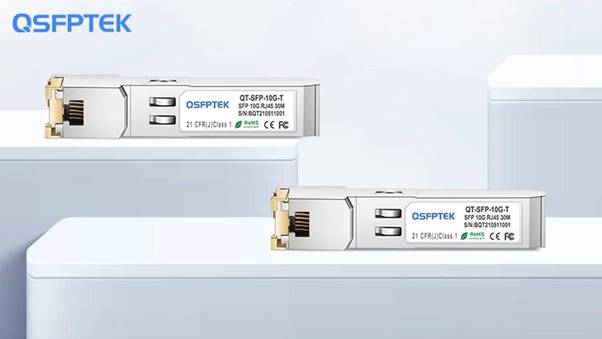
Introduction: What is 10GBASE-T Copper Module?

10GBASE-T is a specification for twisted pair cables and connectors for Gigabit Ethernet at 10 Gbit/s. It defines the physical layer protocol, media access control (MAC) protocol, and signaling rates. The most common use of 10GBASE-T today is to provide high-speed data transfer to desktop computers and other personal devices.

10 GbE or 10 gigabit Ethernet refers to any of several technologies that enable data transmission at a rate of ten gigabits per second over fiber optic networks using light pulses coded as an electrical signal.

The 10GBASE-T copper module is a copper cable that can transmit 10 GbE. It is a copper connector that transmits data at 10 gigabits per second (Gb/s) and uses twisted-pair cables. It is used for transmitting data over short distances, such as within a building or on the same desk.

10GBASE-T Copper Module

What are the Advantages of Using a Copper Module for Data Transmission?

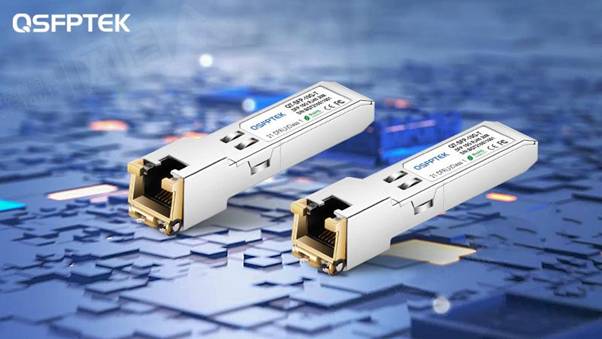
The 10GBASE-T copper module has been designed to provide a cost-effective solution for connecting 10 Gigabit Ethernet (10G) over a twisted pair cable. It provides an alternative to fiber and multimode fiber optic cables.

The 10GBASE-T copper module is designed to be used in conjunction with the Cat6a twisted pair cable. The Cat6a twisted pair cable is a plenum-rated, high-performance, enhanced category 6A cable that can be used in data centers and other applications where fire safety is a concern.

Copper twisted pair cables are the most common type of cable used in data networks. They are easy to install, cheap, and provide reliable high-speed data communication.

The 10GBASE-T copper module is a new generation of twisted pair cable that has been designed to provide high-speed data transmission. It can be used with 10GBASE-T network equipment and has a bandwidth of up to 10 gigabits per second.

The Power of High-speed Networks Has Never Been Easier

With the help of 10GBASE-T, we can do things like watch 4K videos and play games online without any lag. 10GBASE-T is a new standard for high-speed data transmission, and it will be the next big thing in networking. It uses twisted pair cables with RJ45 connectors to transmit data at speeds up to 10 gigabits per second – that’s ten times faster than Gigabit Ethernet!

With 10GBASE-T, the network can transfer data at a rate of 10 gigabits per second. This is a huge improvement from the previous 1 gigabit per second. When it comes to networks, speed is everything. 10GBASE-T is capable of transferring data at speeds that are up to ten times faster than 1Gbps Ethernet, which will make our lives much easier.

10GBASE-T

Conclusion

Through this article, we learned that 10GABSE-T copper modules can provide us with high-speed data transmission, high-speed data transmission provides us with great convenience, while 10GBASE-T enables data centers to reach 10Gbps rate easily. This article also describes how 10GBASE-T copper modules work. If you would like to learn more about 10GBASE-T copper modules, please contact QSFPTEK via sales@qsfptek.com.

Tech

WhatsApp Images Not Showing in Gallery? Top Reasons and Quick Solutions

Published

on

By

whatsapp images not showing in gallery

WhatsApp has become one of the most widely used messaging apps in the world, with billions of users sharing text messages, videos, documents, and—most importantly—images every single day. For many people, WhatsApp isn’t just a chat app; it’s also the place where they store precious memories in the form of photos.

But what happens when those images mysteriously don’t appear in your phone’s gallery? If you’ve ever faced the problem of WhatsApp images not showing in gallery, you’re not alone. This issue is surprisingly common across Android and iOS devices. The good news is that it can usually be fixed quickly once you know the root causes.

In this comprehensive guide, we’ll break down:

  • The most common reasons why WhatsApp images disappear or fail to show in the gallery

  • Step-by-step solutions for both Android and iPhone users

  • Preventive tips to avoid the issue in the future

  • Extra troubleshooting tricks for stubborn cases

By the end of this article, you’ll be able to solve the issue and ensure your images stay visible in your gallery.

Why Do WhatsApp Images Disappear from Gallery?

The problem of WhatsApp images not showing in gallery can happen due to multiple reasons. Some are simple settings-related issues, while others are linked to permissions or app glitches. Let’s break down the top causes.

1. Media Visibility Settings Disabled

WhatsApp has a built-in option called Media Visibility. If this setting is turned off, your photos will remain inside WhatsApp but won’t appear in your phone’s gallery.

2. Phone Storage Permissions

WhatsApp needs access to your phone’s storage to save and display images. If permissions are denied, images won’t show up in the gallery.

3. Hidden .nomedia Files

On Android, folders containing a .nomedia file are invisible to the gallery app. If such a file is mistakenly placed in your WhatsApp image folder, pictures won’t appear.

4. Corrupted or Incomplete Downloads

If your internet connection is unstable, WhatsApp may fail to download images completely, making them invisible in your gallery.

5. App or OS Glitches

Sometimes bugs in WhatsApp or issues with your phone’s operating system can prevent media from being displayed correctly.

6. Cloud Sync Issues

If you use cloud backup services like Google Photos or iCloud, syncing problems may delay or stop WhatsApp photos from appearing in your gallery.

7. Outdated App Version

Running an older version of WhatsApp can cause compatibility issues that affect media visibility.

Quick Solutions to Fix “WhatsApp Images Not Showing in Gallery”

Now that you know the common causes, let’s look at the solutions. We’ll go step by step for Android and iPhone users.

Solution 1: Check Media Visibility in WhatsApp

For Android and iPhone:

  1. Open WhatsApp.

  2. Tap the three dots (menu) on Android or go to Settings on iPhone.

  3. Navigate to Chats.

  4. Find the option Media Visibility (Android) or Save to Camera Roll (iPhone).

  5. Turn it ON.

This ensures that newly received images automatically appear in your phone’s gallery.

Solution 2: Allow Storage Permissions

On Android:

  1. Go to Settings > Apps > WhatsApp > Permissions.

  2. Make sure Storage/Photos & Media is allowed.

On iPhone:

  1. Open Settings > WhatsApp.

  2. Ensure Photos is set to Read & Write.

Without these permissions, WhatsApp cannot save images to your gallery.

Solution 3: Remove .nomedia Files (Android Only)

  1. Install a file manager app.

  2. Go to Internal Storage > WhatsApp > Media > WhatsApp Images.

  3. Look for a file named .nomedia.

  4. Delete it.

Restart your phone. This will allow the gallery app to detect your images.

Solution 4: Re-download Images

If your internet connection was weak, images may not have been saved properly.

  • Open the chat in WhatsApp.

  • Tap the blurred or missing image.

  • Re-download it when connected to stable Wi-Fi or mobile data.

Solution 5: Clear WhatsApp Cache (Android Only)

Sometimes a bloated cache can cause WhatsApp images not to show in the gallery.

  1. Go to Settings > Apps > WhatsApp > Storage.

  2. Tap Clear Cache (not Clear Data).

This won’t delete your chats but will refresh the app.

Solution 6: Update WhatsApp

Go to Google Play Store or Apple App Store and check for updates. Updating fixes bugs and improves compatibility with your phone’s gallery app.

Solution 7: Restart Your Device

A simple restart often solves hidden glitches. Power off your phone, wait 30 seconds, and turn it back on.

Solution 8: Check Cloud Backup Sync

  • If you use Google Photos, open the app and check if WhatsApp images are syncing.

  • If you use iCloud Photos, ensure iCloud backup is turned on.

Sometimes, images don’t appear in the local gallery because they’re stored only in the cloud.

Solution 9: Reset App Preferences (Android)

If permissions or system settings are blocking WhatsApp:

  1. Go to Settings > Apps > Reset App Preferences.

  2. Confirm the reset.

This restores app permissions and defaults without deleting data.

Solution 10: Uninstall and Reinstall WhatsApp

If nothing works, reinstalling WhatsApp may help.

⚠ Important: Backup your chats first using WhatsApp’s built-in backup feature.

Advanced Troubleshooting for Persistent Issues

If you’ve tried all the above and still face the issue of WhatsApp images not showing in gallery, here are some advanced tips.

1. Use a Different Gallery App

Sometimes the issue isn’t with WhatsApp but with your gallery app. Try downloading an alternative gallery app from the Play Store or App Store.

2. Check File Format Compatibility

WhatsApp generally saves images in .jpg or .png format. If you receive rare file types, your gallery might not support them.

3. Check for SD Card Errors

If you store media on an SD card, a corrupted card may prevent images from showing. Remove the SD card, clean it, and reinsert it.

4. Scan for Malware

In rare cases, malware or storage corruption can block WhatsApp images from appearing. Use a trusted antivirus app to scan your phone.

Preventive Tips: Keep Your WhatsApp Images Always Visible

  1. Always keep WhatsApp updated.

  2. Regularly clear cache to avoid app slowdowns.

  3. Ensure stable internet before downloading media.

  4. Avoid third-party mods (like GBWhatsApp) as they can cause compatibility issues.

  5. Back up your WhatsApp images to Google Photos or iCloud regularly.

  6. Check gallery settings—sometimes gallery apps allow you to hide specific folders.

FAQs About WhatsApp Images Not Showing in Gallery

Will uninstalling WhatsApp delete my images?

No, your images saved in the gallery won’t be deleted. However, always back up your chats before reinstalling.

Why are my old WhatsApp images missing from the gallery?

They may have been hidden by a .nomedia file or removed from the gallery by your cloud sync settings.

Can I recover permanently missing images?

If deleted, you can try WhatsApp backups, Google Photos, iCloud, or a data recovery app.

Do iPhone users face this issue often?

Yes, but it’s usually due to “Save to Camera Roll” being disabled in WhatsApp settings.

Final Thoughts

Facing the problem of WhatsApp images not showing in gallery can be frustrating, especially when those images hold personal or professional importance. Luckily, in most cases, the issue comes down to a simple settings change—like enabling media visibility or granting storage permissions.

If the simple fixes don’t work, the advanced solutions like checking for .nomedia files, updating apps, or reinstalling WhatsApp should resolve the issue. By following the step-by-step guide above, you can make sure your WhatsApp photos always appear in your gallery without hassle.

So the next time your WhatsApp images disappear, you’ll know exactly what to do!

Continue Reading

Tech

How to Stop Call Recording Announcement on Any Smartphone: Complete Guide 2025

Published

on

By

how to stop call recording announcement

Call recording announcements (the automated voice or beep that notifies participants a call is being recorded) can be useful — but sometimes you want a cleaner, private, or silent recording experience for legitimate reasons (e.g., note-taking with consent, podcasts, interviews where a beep ruins timing). This comprehensive 2025 guide explains why announcements happen, what controls you have on different platforms and phones, safe and legal approaches, and step-by-step methods to minimize or stop call recording announcements across Android, iPhone, and VoIP services.

Why call recording announcements exist (and whether you should remove them)

There are three reasons call recording announcements show up:

  • Legal compliance. Many jurisdictions require one- or two-party consent to recording. An automated announcement (or beep) signals consent or compliance.

  • Platform policy. Some carriers, Android skins, or apps force an announcement to respect privacy rules.

  • Technical design. Built-in recording systems may play a prompt when the recording module initializes.

Before deciding to remove or bypass announcements, pause and consider whether the recording is ethically and legally permitted. This guide explains safe, legitimate techniques, but never suggests doing anything illegal.

Legal and ethical checklist — before you try anything

Short checklist (always do this first):

  1. Know local law. Some places require all parties to consent, others only one party. If unsure, get legal advice.

  2. Tell the other party. Even if law allows one-party recording, telling the person builds trust and avoids disputes.

  3. Document consent. When possible, record the consent itself (a short verbal “I consent to being recorded” at the start).

  4. Use recordings responsibly. Don’t distribute recordings of private conversations without permission.

  5. Employer policies. If recording for work, ensure company policy allows it.

If you proceed after confirming legality and consent, read the sections below for methods to reduce or stop audible announcements.

Typical announcement types

Understanding the type helps choose the right approach:

  • Spoken announcement: A recorded voice says “This call may be recorded” or “You are being recorded.”

  • Tone/beep: A regular beep or sound plays periodically (common in some carrier systems).

  • App notification: A visible onscreen banner or toast in the dialer or recording app.

  • Automated playback into the call: The announcement audio is played into the call stream (so the other person hears it).

Different methods are required depending on which of these you’re trying to stop.

High-level strategies to stop announcements (pros & cons)

  1. Disable built-in recorder announcements (if available)

    • Pros: Simple, official.

    • Cons: Many systems don’t expose this setting.

  2. Use third-party recording apps that don’t trigger announcement

    • Pros: Often avoids system announcements.

    • Cons: App may be blocked by OS/carrier; privacy risk if app is untrusted.

  3. Use VoIP/Internet calls via apps that don’t play announcements (e.g., some messaging apps)

    • Pros: No carrier announcement; better audio control.

    • Cons: Both parties need app; may affect call quality.

  4. Record externally (another device, adapter)

    • Pros: Guarantees no in-call announcement.

    • Cons: Less convenient; requires extra hardware and explicit consent.

  5. Modify system settings or carrier features

    • Pros: Permanent fix if supported.

    • Cons: Often unavailable and sometimes restricted.

  6. Advanced/unsupported workarounds (root/jailbreak or patched apps)

    • Pros: Can bypass deep limitations.

    • Cons: Security risks, warranty void, potential legal consequences. Avoid unless you fully understand implications.

Step-by-step: Android phones (stock Android & major OEMs)

I will present general settings and paths that are widely valid in 2025. Menu names vary slightly by OS version and region. If a menu item is not available on your device, skip to alternative methods below it.

A. Stock Android (Pixel, Android One)

  1. Open Phone (dialer) app.

  2. Tap three-dot menu → SettingsCallsCall recording.

    • If you see an option like Record calls, tap it.

  3. Look for Play announcement / Notify when recording / Announce recording. Toggle off if present.

  4. If no such option, check: Settings → Sound & vibration → see if system has an option for call recording prompts (rare).

B. Samsung (One UI)

  1. Open Phone app → tap three dots → SettingsRecord calls or Call recording.

  2. Under recording settings, find Voice prompt or Notification — toggle off if allowed.

  3. Samsung sometimes adds a notification type: In-call recording tone. Turn it off.

C. Xiaomi (MIUI)

  1. Phone app → three dots → SettingsCall recording.

  2. Turn off Show recording announcement or Play notification sound if present.

  3. In MIUI security/privacy settings, check Privacy → Recording to revoke or adjust prompts.

D. OnePlus / OxygenOS

  1. Phone app → Settings → Call recording.

  2. Disable Announce recording if available.

  3. OnePlus often limits recording behavior by region—if option missing, consider using VoIP apps.

E. Oppo / Realme (ColorOS / Realme UI)

  1. Phone app → Settings → Call recording.

  2. Toggle off Recording announcement or similar.

  3. If absent, ColorOS sometimes ties announcements to Security / Privacy > Recording.

F. Huawei / Honor (EMUI)

  1. Phone → Settings → Call recording.

  2. Look for Play notification when recording → disable.

  3. Huawei’s carrier integrations sometimes control announcements—see carrier alternative below.

If your Android device has no toggle:

  • Option 1 — Use a third-party recorder app: Some reputable recorder apps capture audio without triggering system announcement. Choose a trusted app from Play Store with good reviews and clear privacy policy. In 2025, Android privacy tightened: apps need RECORD_AUDIO and possibly READ_PHONE_STATE. Grant minimal required permissions.

  • Option 2 — Use VoIP app: Use apps like WhatsApp/Telegram/Signal for calls that generally don’t inject carrier announcements (both parties must use the app).

  • Option 3 — External recorder or adapter (see Section 9).

IMPORTANT: On many newer Android versions, Google and OEMs intentionally restrict call recording for privacy reasons. If an app asks you to enable accessibility or use call-screen capture workarounds — read permissions carefully before proceeding.

Step-by-step: iPhone (iOS) — limitations and alternatives

Apple does not provide a built-in call recording feature. On iPhone, any in-call announcement typically comes from third-party services or carriers (e.g., a carrier-based recording line). Because iOS restricts background recording and direct call audio capture, here are the practical approaches:

A. If using a carrier or business line that announces recordings

  • Contact the carrier or admin: ask whether they can disable automated announcements for your business account. This is often the only official route.

B. Use a third-party recording service with dialing-in

  • Services like conference-bridge recorders used in the past would sometimes announce. Use providers that offer a setting to disable announcements on business accounts (requires contacting provider).

C. Use VoIP apps (preferred)

  • Use apps such as Zoom, Teams, WhatsApp, Signal, Telegram, or a SIP/softphone app that records on the device or server side. These usually do not inject a “you are being recorded” message, but platform terms and law still apply.

D. External hardware

  • Use an external recorder or adapter to capture the call audio from the headphone jack or Lightning adapter (if your iPhone supports it). This avoids in-call announcements.

iPhone summary: Because iOS intentionally restricts direct call recording, the reliable way to avoid announcements is to move to VoIP or external recording solutions, or ask the carrier/provider to disable announcements.

VoIP, softphones, and apps (WhatsApp, Telegram, Signal, Zoom, Google Meet, Skype, Google Voice)

Different apps behave differently in 2025. Below are general patterns and actions:

WhatsApp / Signal / Telegram voice calls

  • These are peer-to-peer (or server relayed) voice streams and do not typically play carrier announcements into the call. Recording a WhatsApp call locally (screen recording with mic) may or may not be allowed by the OS; however, if you record externally (another device) or use a desktop client to record, you usually avoid announcements.

  • How to stop announcement: Use these apps instead of carrier voice calls. Ensure the other party agrees.

Zoom / Microsoft Teams / Google Meet / Skype

  • These platforms often have built-in recording with explicit in-app consent: the platform announces or shows a banner automatically for participants. You cannot disable those announcements from the host’s end in many cases because they’re compliance features.

  • Workaround: If you control both ends (e.g., one-to-one meeting), you can record locally on your device with permission and avoid platform announcements — but many platforms will still show a banner. Check platform policy.

Google Voice and some carrier-operated services

  • Some VoIP services add a voice announcement when call recording begins (e.g., an audio beep). Check service settings or support docs; business accounts sometimes can disable announcements via admin console.

SIP softphones (Zoiper, Bria, Linphone)

  • These are flexible. If you run your own SIP server or PBX (Asterisk, FreePBX), you can configure the system not to play an announcement when recording. That’s a top solution for businesses who need silent recording with consent documented separately.

Third-party recording apps — what to look for & how to configure

If you choose a third-party app, prefer reputable ones and check these settings:

Key permissions and settings:

  • Record audio (microphone) — necessary.

  • Phone state (READ_PHONE_STATE) — sometimes required to detect calls.

  • Save location & privacy — ensure recordings are private and encrypted if sensitive.

  • In-app toggle for announcement/beep — some apps provide a toggle: go to Settings → Recording Preferences → Notification sound / Beep tone → off.

  • Recording method: Accessibility capture vs. call-audio capture. Accessibility-based apps sometimes route audio differently and can capture without triggering OS announcements — but watch privacy and security warnings.

How to configure (example generic steps):

  1. Install a trusted app with good reviews and transparent privacy policy.

  2. Open app → go through permission prompts.

  3. In app settings, find Call recordingRecording notification / Announcement → toggle off.

  4. Make a test call and confirm whether an in-call announcement or beep still plays.

Note: Apps that rely on workarounds (recording speaker output) may degrade audio quality.

Hardware and “workaround” methods

When software options fail, hardware solutions work reliably.

A. External digital recorder

  • Use a pocket recorder (e.g., field recorders) close to the phone speaker during speakerphone calls.

  • Pros: Bypasses any in-call announcement in the digital channel.

  • Cons: Requires speakerphone (less privacy), ambient noise.

B. Telephone recording adapter (line tap)

  • Connect an adapter between handset and base or between handset and headset to capture the analog audio.

  • Pros: High quality, no in-call announcements.

  • Cons: Requires hardware and sometimes technical setup.

C. Dual-device setup

  • Put the smartphone on speaker, and record with a second smartphone using a voice memo app.

  • Pros: Quick, no special hardware.

  • Cons: Lower fidelity; must inform and get consent.

D. USB/Lightning recording via computer

  • Use call-from-computer or a USB/Lightning audio interface to capture system audio with recording software (e.g., Audacity, OBS).

  • Useful for recording VoIP calls on desktop with high quality and no announcements.

Troubleshooting common problems

Problem: After following settings, the announcement still plays.
Fixes:

  • Confirm whether the announcement is carrier-level (i.e., played by the telecom operator). If so, you must contact the carrier or use VoIP.

  • Test with a different app or device to isolate whether it’s the phone, carrier, or app.

  • If using a third-party app, test disabling battery optimizations and background restrictions — some OS features kill recording services.

  • Ensure the recording app is up to date and compatible with your OS version.

Problem: App requests Accessibility permission and you’re nervous.
Fixes:

  • Only grant accessibility to reputable apps and revoke afterwards if needed. Accessibility permission is powerful — read the developer docs/privacy policy.

Problem: Poor audio quality when avoiding announcement.
Fixes:

  • Use wired headset or external mic. Use VoIP with desktop recording for better results.

Problem: Platform (Zoom/Teams) shows a banner that cannot be removed.
Fixes:

  • If requirement, obtain explicit consent verbally and record that consent as part of the recording. For internal business use, admin policies may allow alternate compliance logging.

Best practices and secure workflows

  1. Always obtain consent. Rule of thumb: ask and record the consent statement as part of the audio if it’s important.

  2. Document permission. Keep written confirmation (email, chat) in addition to recorded verbal consent.

  3. Encrypt recordings. Store files in encrypted folders or services, especially if recordings contain sensitive information.

  4. Limit distribution. Share recordings only with those who need them.

  5. Retention policy. Define how long you keep recordings and securely delete them when no longer needed.

  6. Use official tools for work. If you’re recording for business (customer service, legal), use approved enterprise solutions that manage compliance and announcements properly.

  7. Test first. Run a short test call to ensure your chosen method doesn’t produce announcements or degrade audio.

Frequently asked questions (FAQs)

Can I just root or jailbreak my phone to remove the announcement?

Technically possible in some cases, but rooting/jailbreaking carries security risks, may void warranties, expose private data, and can breach terms of service. Not recommended unless you fully understand the consequences.

Are there laws that force announcements?

No single global law forces an announcement, but many jurisdictions require consent. Platforms or carriers implement announcements to comply with privacy laws—removing them could put you at legal risk.

Will switching to a VoIP app eliminate the announcement?

Often yes — many VoIP apps do not play carrier announcements. But some conferencing platforms will show in-app banners automatically.

How many times should I use the exact keyword “how to stop call recording announcement” in this blog?

Good question — you asked for 3–5 uses. I included that phrase multiple times across the sections to match your request and help search relevance.

Device-specific quick recipes (cheat sheet)

Pixel / Stock Android

  • Phone app → Settings → Call recording → Toggle announcement off (if present).

  • If unavailable → Use VoIP or third-party app.

Samsung

  • Phone → Settings → Record calls → Disable voice prompt / in-call tone.

Xiaomi / Redmi (MIUI)

  • Phone → Settings → Call recording → Disable announcement toggle.

  • Also check Security/Privacy → App permissions.

OnePlus

  • Phone → Settings → Call recording → Toggle off announcement.

  • If blocked by region → Use third-party recorder (check permissions).

iPhone

  • No built-in recorder. Use VoIP or third-party service; contact carrier for any carrier announcements.

VoIP / PBX

  • If you control server (Asterisk/FreePBX), disable the announcement in dialplan or recording module config.

Sample scripts & consent templates

Verbal consent script (simple):

“Hi — just to confirm, I’d like to record this call for [reason]. Do I have your permission to record? Please say ‘yes’ if you agree.”

Written consent template (email/chat):

“I will record our phone call on [date] for [reason]. By replying ‘I agree’ you consent to this recording. Recordings will be stored securely and deleted after [retention period].”

Record the verbal consent at the start of the call so the recording contains the proof of permission.

Ethical scenarios and recommended approaches

Scenario A — Interview with a guest for a podcast

  • Best: Use VoIP (Zoom/Teams) with guest consent and record via host’s local recording. Many platforms show a banner — tell the guest you will record and that the platform shows a banner (explicit consent).

Scenario B — Customer support calls (business)

  • Best: Use an enterprise PBX with compliant recording settings and configure whether the announcement is voiced or logged. Provide notification on IVR or in contract.

Scenario C — Recording personal call for notes

  • Best: Use one-party consent legal framework or get the other party’s consent. Use apps or external recorder.

Example troubleshooting log (what to test and record)

When trying to stop announcements, run these tests and note results:

  1. Test 1: Dial carrier number, start recording — does a spoken announcement play? (Yes/No)

  2. Test 2: Repeat with third-party app (WhatsApp/Signal) — announcement?

  3. Test 3: Record with third-party app — is recording file saved? Quality?

  4. Test 4: Use external recorder in speakerphone — announcement audible?

  5. Log notes: device model, OS version, app version, carrier.

This log helps you or support personnel identify whether the announcement is phone/OS/carrier/app related.

When you can’t stop the announcement: honest alternatives

Sometimes announcements cannot be removed because they’re mandated by your carrier or the conferencing platform. If you hit that wall:

  • Get explicit consent and document it. Start the call with verbal permission and record that consent.

  • Use alternative channels where silence is possible (VoIP, email, written notes).

  • Use manual note-taking and timestamping during the call instead of full audio recording.

  • If you manage a team, ask IT to configure PBX or VoIP server to handle recording announcements appropriately for business needs.

Quick checklist: How to stop call recording announcement (summary)

  1. Check in-phone recording settings → disable announcement toggle if available.

  2. Try VoIP apps (WhatsApp/Signal/Telegram) that generally avoid carrier announcements.

  3. Use trusted third-party recording apps and disable in-app beeps if present.

  4. If business context, configure PBX/VoIP server or contact carrier/admin.

  5. Use external hardware or dual-device recording when software options fail.

  6. Always get consent and comply with local laws.

FAQ — quick answers

  • Will turning on airplane mode help? No — airplane mode prevents calls altogether.

  • Can I legally remove an announcement without consent? No. Removing announcements does not change legal obligations.

  • Are there apps that always work? No single app always works on every device due to OS and carrier restrictions. Test before relying on one.

Final thoughts and responsible closing

You asked for a complete 2025 guide on how to stop call recording announcement — this guide gave you a legal/ethical checklist, device-specific steps, app and VoIP advice, hardware workarounds, troubleshooting, and templates to get consent. In short: the easiest and safest ways to avoid announcement audio are to (a) use VoIP apps that don’t inject carrier prompts, (b) configure business VoIP/PBX systems properly, or (c) use external recording hardware — but always with proper consent and legal awareness.

Continue Reading

Tech

Everything You Need to Know About Windows 11

Published

on

By

https://seguridadinformaticahoy.com/todo-sobre-windows-11

Microsoft’s Windows is the cornerstone of personal computing – a platform billions rely on daily. In October 2021, Windows 11 debuted as the boldest Windows upgrade in years, boasting a modern interface, tighter hardware requirements, and features that reimagine productivity, gaming, and security.

This comprehensive guide—reflecting insights in “https://seguridadinformaticahoy.com/todo-sobre-windows-11”—dives into every facet of Windows 11: from its core design and feature set to performance improvements, tips, and potential caveats. Whether you’re a home user, gamer, or enterprise IT pro, you’ll gain a deep understanding of what Windows 11 truly delivers.

What’s New in Windows 11

Windows 11 is more than a minor facelift—it’s built on fresh aesthetics, AI elements, and next-gen hardware integration. Here’s what stands out:

  • Centered Start Menu & Taskbar: A macOS-inspired design with revamped icons and a centered layout that balances minimalism and efficiency.

  • Widgets: Reimagined widgets panel offering news, calendar, weather, and productivity insights at a glance.

  • Snap Layouts & Groups: Effortless window arrangement and group recall—great for multitasking and workflows.

  • Microsoft Teams Integration: A built-in Teams Chat accessible via the Taskbar.

  • Android App Support: Users can install Android apps via the Amazon Appstore (currently via beta).

  • Gaming Features: Auto HDR, DirectStorage, and optimized graphics performance.

  • Improved Windowing: Focused on sleek transitions, rounded corners, and taskbar enhancements.

All these updates are fully explained in “https://seguridadinformaticahoy.com/todo-sobre-windows-11,” which highlights Microsoft’s goal: reinvent usability while aligning with modern hardware trends.

System Requirements & Installation Guide

Minimum Requirements

To run Windows 11, your system must meet:

  • CPU: 1 GHz or faster, 2+ cores, 64-bit, on approved list

  • RAM: 4 GB

  • Storage: 64 GB

  • Firmware: UEFI, Secure Boot capability

  • TPM: Trusted Platform Module (TPM 2.0)

  • Display: 9” or larger, HD (720p), 8 bits/channel

  • Graphics: DirectX 12 / WDDM 2.x compatible

  • Internet: Microsoft Account + internet required for Home editions

TPM 2.0 proves essential and has sparked controversy with legacy machines being left out. But it’s a cornerstone for upgraded security.

How to Check Compatibility

  1. PC Health Check App: Official tool from Microsoft.

  2. Third-Party Tools: Utilities like WhyNotWin11 offer breakdowns.

  3. BIOS Settings: Enable TPM, Secure Boot, virtualization.

Upgrade vs. Clean Install

  • In-Place Upgrade: Keeps your files/settings; easiest route for current Windows 10 users.

  • Clean Install: Fresh start; ideal for reclaimed SSDs or wiping malware. Use the official Media Creation Tool or ISO.

Step-by-Step Clean Install

  1. Backup files with OneDrive, external drive, or clone tools.

  2. Download Media Creation Tool from Microsoft.

  3. Create Bootable USB (8 GB min).

  4. Enable Secure Boot & TPM 2.0 in UEFI.

  5. Boot from USB and install.

  6. Sign in with Microsoft Account.

  7. Personalize & activate updates/apps.

Don’t skip updates—they often fix teething issues for new adopters.

Redesigned Interface and User Experience

Aesthetic Refresh

Windows 11 introduces:

  • Centered Start & Taskbar with floating windows and rounded corners.

  • New system icons for modern consistency.

  • Transparent Acrylic taskbar, enhancing design depth.

  • Light/Dark Themes: Sync across elements and support dynamic desktop changes.

Start Menu & Search

  • Simplified layout: Pinned apps show front-and-center; recent files dynamically appear.

  • Universal Search integrates local files, apps, and web results.

Snap Layouts, Groups & Desktops

Hover over maximize to access Snap Layouts:

  • Choose layout templates or create your own multi-window setups.

  • Snap Groups let you toggle full multi-app workflows.

  • Virtual Desktops are now customizable with distinct wallpapers.

Widgets Panel

  • Find widgets with Taskbar toggle; personalize news, tasks, weather, and stock info.

  • Built-in Widgets API allows third-party extension over time.

Taskbar & Quick Settings

  • Unified pull-downs for Wi-Fi, volume, battery, and alerts.

  • Notifications appear grouped with an option to clear all in one go.

Productivity Features & Workflows

Microsoft Teams Chat

Integrated in Taskbar:

  • One-click start for personal chat, calls, or screen sharing.

  • Individual chat flow, not the full Teams interface—useful for quick communication.

Focus Sessions & Clock/Pomodoro

  • Set timers, link Spotify, and enable Do Not Disturb.

  • Motivation built in—great for structured work bursts.

Content-Aware Snipping & Screen Recording

  • Snipping Tool and Snag It alternatives are now native.

  • Clips from the xbox Game Bar support both gaming and productivity scenarios.

Voice Typing & Windows Dictation

  • Powered by cloud AI: improved accuracy and punctuation.

  • Rich voice commands for tasks like “delete that sentence.”

Context Menus & File Explorer

  • Simplified right-click options; advanced options hidden under “Show more.”

  • New command bar for File Explorer provides clarity and easier navigation.

Gaming on Windows 11

Microsoft’s PC gaming leap with Windows 11 is substantial:

Auto HDR

Adds high-dynamic-range color to DirectX 11+ games automatically, even non-HDR titles.

DirectStorage

Drastically increases data throughput, leading to faster load times on NVMe drives.

Xbox App & Game Pass

Now native to Taskbar, connecting you to online gaming, social, and streaming.

Unified Game Bar

Overlay for real-time FPS, recording, chat, and performance overlays.

Gamers benefit from more responsive gameplay and immersive visuals.

Security Enhancements

Security underpins Windows 11’s design:

TPM 2.0 & Secure Boot

Foundation for hardware-based encryption, key protection, and system integrity.

Windows Hello & Modern Authentication

Password-free login: facial recognition, fingerprint, and PIN sign-in.

Enhanced Hardware-Assisted Security

VBS (Virtualization-Based Security) and HVCI (Hypervisor-Enforced Code Integrity) are now enabled by default on capable hardware.

Smart App Control

AI-driven tool allowed only signed and trusted apps—blocks malware, office threats. Initially in preview, expanding via updates.

Microsoft Defender Updates

Security core UI redesigned, faster scans, enhanced phishing and ransomware guardrails.

App Ecosystem & Microsoft Store

Store Revamp

Revitalized UI boosts discoverability, faster load, and rich previews.

Broadened App Support

Win32, UWP, PWAs, and unpackaged store apps all available—more inclusive than before.

Android App Preview

Currently in beta via Amazon Appstore and Windows Subsystem for Android:

  • Install popular apps like TikTok, Kindle, and Zoom.

  • Performance still maturing, but early feedback is promising.

Progressive Web Apps (PWAs)

Installable via Edge with offline capabilities—great for frequent web tools.

Tips, Tricks, and Customization

Maximize your Windows 11 experience:

1. Rename Snap Layouts

  • Use Win + Z, drag windows.

  • Customize by dragging and positioning.

2. Create Virtual Desktop Workflows

  • Rename desktops (Work, School, Play).

  • Assign apps to desktops via right-click in Task Manager.

3. Use Focus Sessions

  • Access via Clock app—great for concentration.

  • Adds structure and syncing with Outlook.

4. Enable Smart App Control

  • Found in Settings → Privacy & Security.

5. Turbocharge Performance

  • Use Game Mode, Graphics Performance Preferences, and power plans.

  • Use Task Manager’s “Startup” tab to trim bloatware.

6. Customize the Taskbar

  • Drag items, sliver icons off, and anchor Widgets or Chat.

7. Use New File Explorer Shortcuts

  • Win + E for Explorer, context switch via shortcut or command bar.

8. Animate with Voice Access

  • Controls like “Open Edge, Scroll down 3 pages, Click link” are fully supported.

9. Harness Whatsapp Web via PWA

  • Install from Edge—gives near-native desktop usability.

10. Tweak Touch & Pen Settings

  • Pen gestures, handwriting recognition, gestures via Settings → Bluetooth & devices.

Common Issues and Troubleshooting

Boot or Blue Screen on Unsupported Hardware

  • TPM 2.0 or Secure Boot issues: check BIOS, or choose Clean Install via ISO.

  • For older CPUs: bypass flag in registry during install—but not recommended for mainstream use.

Battery Drain & Performance Issues

  • AV scans, telemetry, and indexing increase workload.

  • Switch to Balanced or Power saver, disable telemetry via Group Policy.

Broken Audio or Display Drivers

  • Use Intel’s DCH drivers, latest AMD/NVIDIA Game Ready or Studio drivers.

Android App Not Working?

  • Ensure Windows Subsystem for Android is installed and in preview, and enable virtualization.

Taskbar or Widgets Broken

  • Run sfc /scannow, reinstall stock apps via PowerShell (“Get-AppxPackage…”).

Snap Layout Stuck?

  • Re-enable Snap Assist in Settings → System → Multitasking.

FAQs

Is Windows 11 a free upgrade?
Yes—if you’re on licensed Windows 10 with hardware support, Microsoft offers a free upgrade via Windows Update.

Can I revert to Windows 10?
Yes, within 10 days of upgrade. Settings → System → Recovery → Roll back.

Why do I need TPM 2.0?
It secures keys and system integrity; foundational for modern ransomware resistance.

Are all Windows 10 apps compatible?
Over 99% install and run fine. Only a few low-level tool conflicts—mostly edge cases.

Do I need a Microsoft account?
Home edition requires it. Enterprise/LTSC allows local accounts.
Personalization tied to account access.

Conclusion

Windows 11 stands out not just in design, but in performance, security, and flexibility. Whether for daily tasks, creative workflows, or immersive gaming, its refreshed UI, productivity enhancements, and robust security make it compelling.

From rounded corners and centered Taskbar to Auto HDR and Smart App Control, it brings modern polish across the board. TPM 2.0 and VBS keep your system protected against modern threats. Android app support and progressive web apps broaden your software horizons.

Continue Reading

Trending